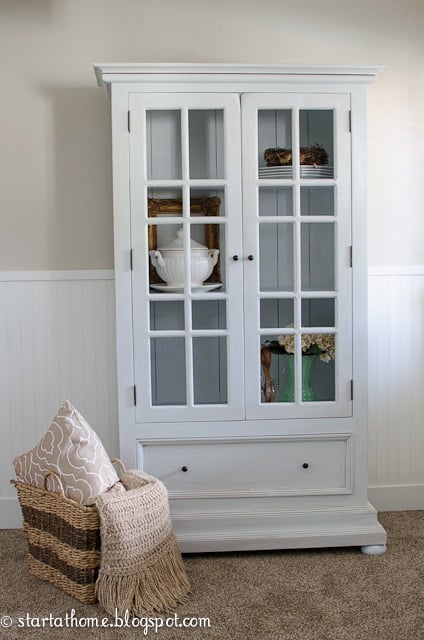
Here are the basics on how to hand paint your furniture like a pro.
I like to use latex paint, as it has held up the best against my kids over the last 4 years.
I have experimented with many specialty paints (chalk paint and milk paint) and I do believe they have their place, I use them for accent pieces or various decor items. But for me, if I am going to put in hours after hours to refinish a piece of furniture that gets lots of use I want it to last!

Here is a list of items you will need to paint your furniture with links to Amazon. These items can also be bought at Home Depot, Lowes, Ace Hardware or your local hardware store.
Supplies
- Sandpaper - I like to use100 grit to sand everything down in the beginning and 220 for in-between coats.
- Flotrol
- Latex Primer - I like to use Kiltz Latex primer or Zinsers Latex Primer. They cover great and are cost effective.
- Latex Paint- I like to use Sherwin Williams, Ace's Valspar or Benjamin Moore
- Paint Brush-Selecting a brush is also very important. I like to use Purdy or Zibra Brushes they have soft smooth bristles making for a smooth finish.
Prep Work:
Taking apart- First of all I take all the hardware off and the doors. I like to disassemble all of my pieces as much as possible. It allows me to keep the hardware clean and free of paint plus I get a much better paint job.
Sanding- Now it is time to pull out your 100-grit sand paper. You want to sand everything down, every last inch. The finish doesn't have to be all the way off but it needs to be roughened up so the paint will have something to stick and grab on to. It is also a good time to make sure your surface is good and smooth. If you surface isn't smooth it will show when it is painted.

Painting:
Priming- getting a good even coat of primer everywhere is key to making sure your paint is going to stick. Primer helps to seal your surface allowing for even painting. Primer also helps paint stick and bind to your piece of furniture.
Sanding in between coats- Once your primer is dry use 220 grit sandpaper to smooth out your paint. This will also help to eliminate brush marks (I also lightly sand in-between each paint coat)
Painting- I like to add a little bit of Flotrol to my paint. Flotrol helps to eliminate brush marks in your paint without deluting your paint color. Start at the top and use long straight brush strokes whenever possible.
This hutch required 3 coats to cover.
This hutch required 3 coats to cover.

Finish Work:
Antiquing- I always like to sand at least the edges of my piece. Paint is hard, it will chip. However eliminating paint from the places it is most likely to chip from will help your paint stay looking nice even longer. If you like your pieces more distressed you can sand it more in certain areas. I like to sand in areas that I think the paint will naturally flake off at for a more natural look.
Antiquing- I always like to sand at least the edges of my piece. Paint is hard, it will chip. However eliminating paint from the places it is most likely to chip from will help your paint stay looking nice even longer. If you like your pieces more distressed you can sand it more in certain areas. I like to sand in areas that I think the paint will naturally flake off at for a more natural look.


Glazing-After your paint has dried/cured for 24 hours. It will be ready to glaze. There are many different ways to glaze. I wanted a heavy glaze on this hutch so I used stain. Stain can be tricky to glaze with so make sure and follow my "glazing with a stain" tutorial here.

Top Coat-A top coat is one of the most IMPORTANT steps of this process. A top coat is what will seal and protect your piece you have worked so hard on. I personally like to use Varathane Water-Based Diamond Polyurethane Finish in a spray can. It eliminates brush marks and goes on nice and even!
After you have top coated your piece let is sit for at least 24 hours before you start using it. This will give your paint and top coat time to set up. Keep in mind, latex paint can take up to 30 days to fully cure and harden, but it is okay to use it before then.
I hope this guide has helped you to refinish your furniture like a pro!!
TTFN
Brooke


No comments:
Post a Comment